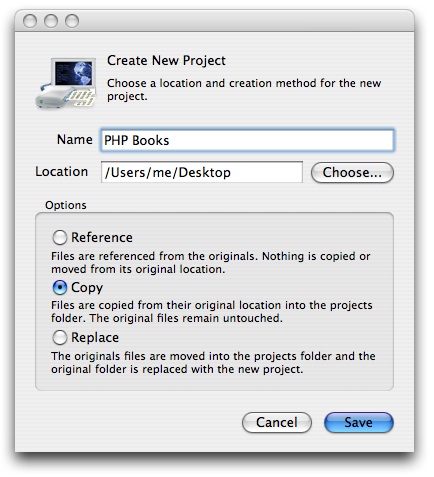
Creating a new project from a folder.
Projects are groups of files and various other settings such as FTP servers, preview/command line settings and individual settings for files. Files are merely references to the originals so deleting them or otherwise altering them will not affect the original files. This is in contrast to many other programs which use projects to mimic the actual files on your hard disk.
Projects allow you to manage large groups of files independently from the hard disk, navigate complex programs by symbolics, utilize the built-in FTP client, search the projects files and customize application functionality based on the projects intended purpose.
Creating projects is quick, easy and can be made in a done ways:
|
The last two methods require you to provide additional information about the new project. The image below shows the window which will appear after choosing a folder. When copying or replacing, the files will be placed into the Sources folder inside the project, otherwise they will remain in their original location.
Creating a new project from a folder.
Projects can be stand-alone windows or feature a built-in editor in a split window by default. If wish to use a separate window for your project and editor windows follow the steps below.
|
|
|
|
Options apply only the respective project and affect all files in the project. In some cases they override application preferences and thus allow you to customize functionality on a project per project basis. The options window (displayed below) can be opened by clicking the Options button in the toolbar or in the Project menu.
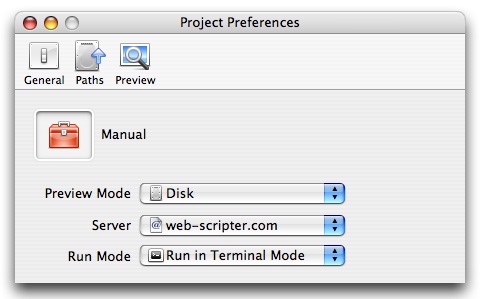
Project preferences window
Either by right-clicking or holding down the control key while clicking a contextual menu will be displayed for the selected item. The menu contains various useful features that affect the currently selected item.
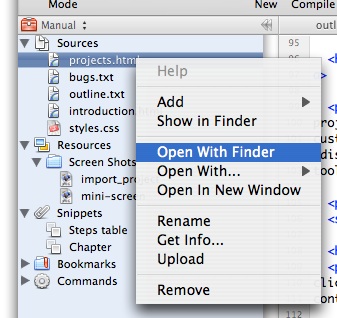
Contextual menu for the selected file.
Files are references to the originals stored on the hard disk so adding them to a project or otherwise altering them will not affect the originals. Files can be added to the project in a few ways.
|
Files and other items in the project can be renamed by choosing the Rename Item item in the Project menu or by using the contextual menu on the item and choosing Rename.
Files and other items in the project can be removed by choosing the Remove item in the contextual menu or Remove Selected Items in the action menu  . Files are just references to the originals so removing them will not affect the file on your hard disk.
WebScripter does not keep hard links to files but rather paths which are relative to the file. For example the project only knows of a files name, so a path must be supplied to tell it the file "data.txt" exists at "Users/me/Desktop/". By default, WebScripter automatically adds new paths to the project when files are added so generally paths should not concern you.
Paths can be specified by project or application. Paths defined in the project only affect files within that project and application paths affect all files, overriding project paths.
Paths may be relative to a few locations:
|
For example, assume you have some files within Sites inside the folder "WebSite" that you want to reference. In the project preferences window add a new path and set it relative to Localhost then set the path to /WebSites. Assuming your user name was "me" the path would look like /Users/me/Sites/WebSites and any files within that folder would appear as valid references inside your project.
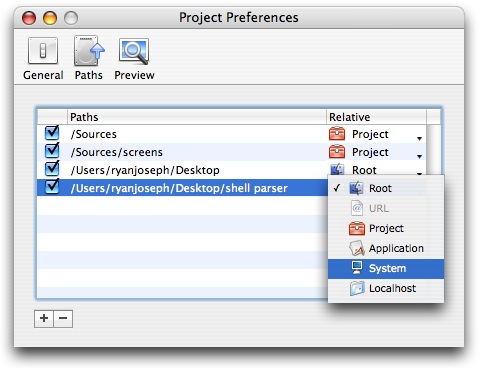
Editing paths in a project.
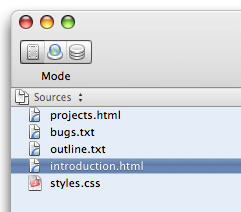
All projects can switch between 3 modes which change the content of the browser on the left side of the window. Modes can be changed in the View menu, using the command key plus 1-3 or the segment view found in the upper left hand corner of every project. The 3 modes are: Source, FTP and Symbol. Modes are explained elsewhere in the manual under their respective chapters.
Mode segment view in Source mode.
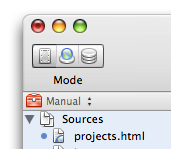
To keep your project browser more manageable you can "focus" on folders and groups by double-clicking on their icon. In the projects title bar the name of the focused item will appear and only items within that folder will be shown. To go back you can click the back arrows to the right or click on the focused items name (in the toolbar above the browser) which will bring up a popup menu.
Focusing on the Sources folder.
Projects can be better organized by adding folders, just like in the Finder. Folders do not actually exist on the hard disk so creating or deleting them will have no affect on your computers files. Folders can be added in a few ways but remember to select the folder or group you want to add into.
|
Files can be labeled like in the finder to help identify commonly used items. To set a files label get info on the desired file then select a color from the Label popup button.
Projects contain 5 groups which contain various features that are the basic tools of the project and help you keep organized.

Empty groups in a new project.
For projects that have configured and setup an FTP server you can upload all files that have been modified to the server, otherwise known as "publishing". Publishing is a one-step operation and will only upload files that have been modified so you can synchronize files on your hard disk with the FTP server.
���Read about setting a projects server here. Also note that the location files are uploaded to is affected by their directory which is defined in the file info window.
To publish a project:
|