Using FTP mode in a project.
Because web development ultimately leads to production on a web server, WebScripter features a built-in FTP client. The FTP client lets you edit, test and deploy scripts for production all within the application. The built-in client is minimalist so for large tasks you may want to use your favorite full-sized FTP client application.
The FTP client is implemented as a side bar in the project window, therefore you must make a project before using FTP.
To open FTP mode read about project modes here.
Using FTP mode in a project.
Before connecting to a server you must define a server description which contains information about the server. Read more about configuring servers here.
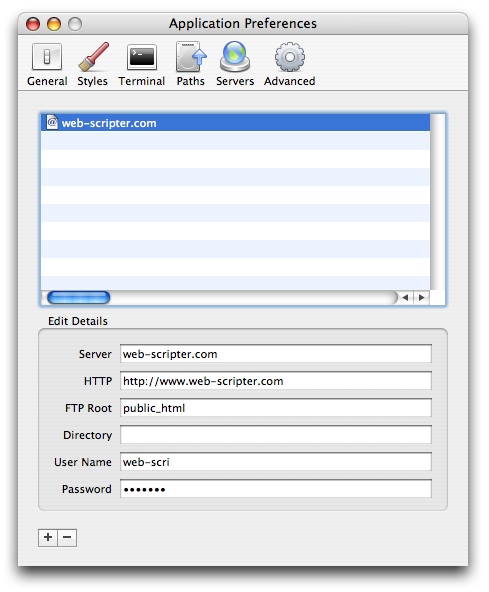
Configuring a server in preferences.
Once you have created a server description you must set the server for the project before you can start using FTP.
To set the project server do the following:
|
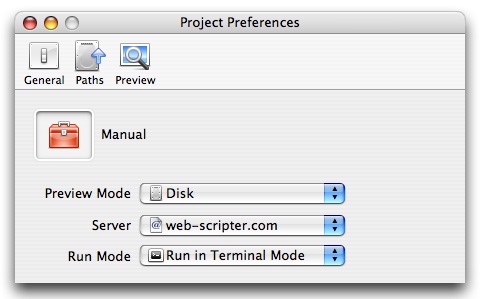
Project preferences window
If you don't need to use the full FTP client you can upload and preview files remotely on a individual file basis by setting a files server.
To set a files server:
|
After a files server has been set you can upload or preview remotely.
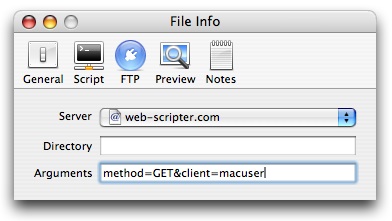
FTP settings for a file.
Connecting happens automatically in projects that have set a server and open directories are restored to their previous state. However, if you are disconnected you can re-connect by using the action menu  or pressing the Connect button in the toolbar about the browser.
Editing files remotely from the server is identical to the normal editting process except files are downloaded before opening and uploaded when saved.
You will be notified of the network operation by the files icon in the browser. Depending on if the file is uploading or downloading it's icon will change and a progress wheel displayed.
You can identify files which exist remotely by the icon in it's tab above the editor (not applicable to non-tabbed editors).
By default when you open a file on the server it will be set to server preview mode and other relevant FTP info set. This means that if the server was configured correctly you can preview the file from it's actual URL on the web server.
If you wish to preview the local copy on the hard disk open file info for the file and set the preview mode to "disk". Note that the file was saved into a temporary cache folder inside the system folder so you can not rely on it's permanency.
If a files server has been set you can upload it to the specified location by clicking the Upload button in the toolbar or the upload command (control-command-S) in the Editor menu.
You will be notified of the network operation by a progress wheel next the files icon in the project browser and an upload icon appearing in the editors toolbar.
The FTP browser works like other FTP clients and similar to the Finder in list view.
Some things to know about navigating with the browser.
|
You can get information about a file on the server such as it's kind, location, size, modification date, group/owner and permissions. The FTP Info window is also where you can rename a file and change it's permissions (chmod).
To get FTP info:
|
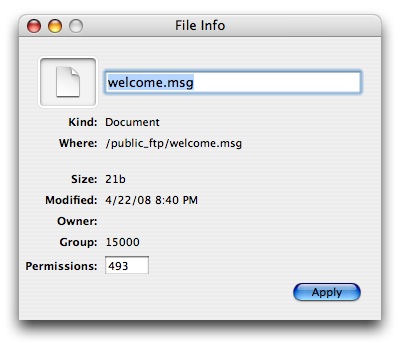
FTP information for a file.
You can upload files by dragging them onto the folder which you want the file uploaded into. Note that currently only files are supported for uploading. If you wish to upload a folder you must first create an empty directory (see the next topic) and drag the folders contents into it.
To create new empty files or folders:
|
You can move files by dragging them onto the folder which you want the file moved into.
If you wish to download files onto your hard disk you can do so simply by dragging the files from the FTP browser to any location on your Mac.
To rename files see the FTP Info window.
To set a files permissions see the FTP Info window.