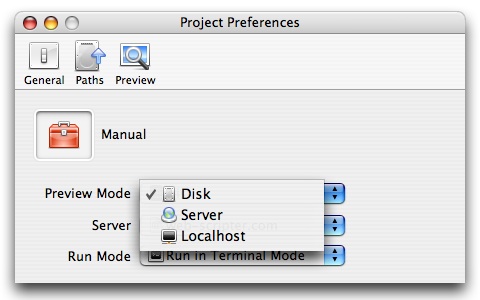
Setting preview mode in the project.
WebScripter offers a wide array of options for previewing files and simplifies the process into a single-click operation so you can test code faster.
There are 3 modes which control the way files are previewed depending on what type of file it is and where the file exists (disk, server etc...). A preview mode can be set by project (all files use the mode during previewing) or by single file which overrides the project setting. Either way once configured previewing is a single-click process.
The 3 modes are explained below.
|
Setting preview mode in the project.
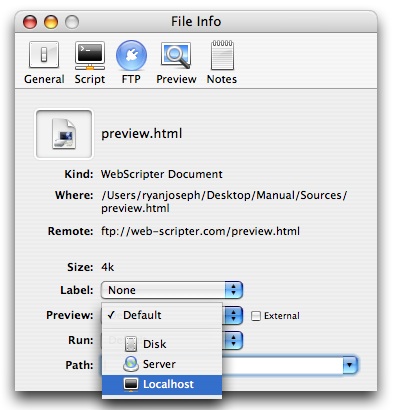
Setting preview mode for a single file.
Optionally, you can preview a file using a specified mode by holding down the Preview toolbar item and selecting the mode or external browser you want from the popup menu.
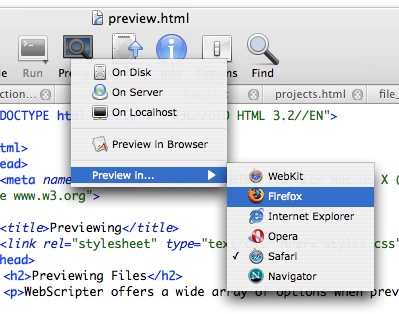
Previewing a file in an external browser.
Before you can use server preview mode or any FTP features in general you must first configure a server description. A description contains everything WebScripter needs to accurately references files from the server, upload and other FTP functions.
To create a new description: Open the application preferences, click on the Servers toolbar item then press the plus icon in the lower left-hand corner. After a new empty description is made you can edit details (explained below). Note that for server mode previews only the HTTP field is required and Directory is optional, all the others are for FTP.
The server description details are explained below.
|
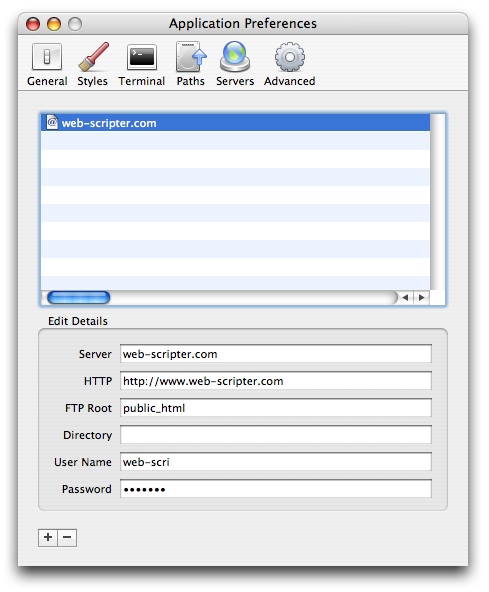
Configuring a server in preferences.
Server previews use the information in a server description to preview the file on the web server from a HTTP URL (providing it was uploaded first). If the information is correct a URL will be generated which matches the files location.
To use server previews follow these steps:
|
If everything was configured properly the preview command should generate the correct URL to your file on the web server. From this point you can use WebScripter's FTP features or choose to upload externally with your favorite FTP client.
Localhost preview allows you to execute files with the Apache web server installed on every version of MacOS X. When Apache is correctly installed files within the Sites folder can be accessed using a special URL and executed just like a web server, even scripts like PHP and Perl.
To use localhost mode you must first configure Apache. Explaining this step is beyond the scope of this manual but there have been numerous others documents which do a great job. Try to google "installing Apache on MacOS" and you will find many relevant results.
If Apache has been installed correctly place the project or files within the Sites folder and WebScripter will generate the proper URL which will cause Apache to execute the file.
WebScripter can preview documents internally using Apple's WebKit (the same HTML rendering engine as found in Safari) or by sending a request to an external web browser. By default previews are internal but there a few methods available to use external browsers.
After previewing using built-in mode the editor pane will be replaced with the web page and a small toolbar above the content. You can go back to the editor by pressing the Edit button (see below) or by using the Close Pane command (command-shift-W).
The toolbar contains 3 items:
|
If you always want to preview in an external browser using the default browser:
|
If you want a single file to preview in an external browser:
|
If you want to preview a single time in an external browser without changing any preferences:
|
In some situations when testing files you don't want to preview the actual file but perhaps another which will invoke the file you are editing. Preview paths allow you to override the default generated URL with another one which reflects the file or URL that you really want to see. A path can point to a file on the hard disk or a URL.
For more general information about paths read Paths.
GET arguments are the text string placed at the end of a HTTP request after the ? symbol, usually from form input using the GET method. WebScripter can simulate form input by appending the arguments for you after a server or localhost mode preview.
To set GET arguments for a file:
|
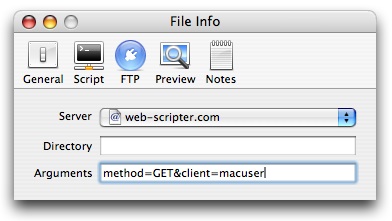
Setting GET arguments in the file info window.
You can preview a file while typing also known as live previewing. After you stop typing wait for a short delay and the content will be updated.
To get live updated previews:
���
|
Note that you don't actually need to open a new window get live previews, WebScripter will always update previews when the original is updated (for HTML files only). Opening a new window is however preferred because you can actually see the preview on screen instead of switching back and forth from tabs.